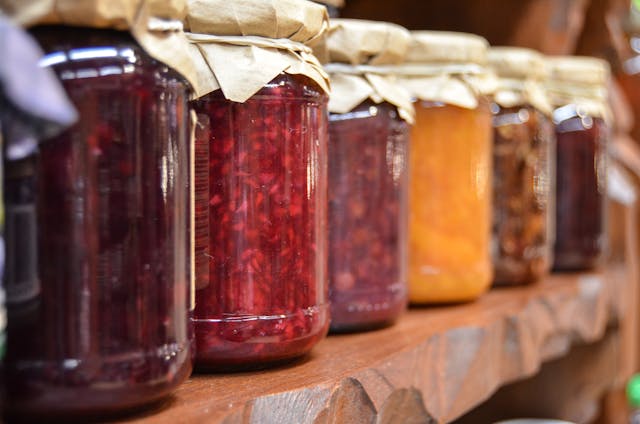
There’s something undeniably special about homemade jam. Whether it’s the rich flavor of perfectly ripe fruit, the sweet aroma filling your kitchen, or the satisfying pop of jars sealing as they cool, making jam is a beautiful tradition that connects us to the rhythm of the seasons. At GertieBlu, we’re all about celebrating those simple joys in life, and what better way than to dive into the art of making jam?
In this post, we’ll explore how to make your own jam at home and all the wonderful ways to enjoy it once it’s ready. So let’s get started!
Why Make Your Own Jam?
There’s a world of difference between store-bought jam and the kind you make yourself. Here’s why making your own is worth the effort:
- Quality Ingredients: You control exactly what goes into your jam—just fruit, sugar, and a little lemon juice. No preservatives, no artificial flavors.
- Customization: You can experiment with different fruits and flavors, adjusting sweetness and ingredients to suit your taste.
- Seasonal Fun: Making jam is a great way to preserve the taste of fresh, seasonal fruit and enjoy it all year long.
- Gifting: Homemade jams make for thoughtful, delicious gifts that are always appreciated.

Basic Jam Recipe
Making jam is easier than you might think, and it only requires a few ingredients. Let’s break it down.
Ingredients:
- 2 pounds of fresh fruit (berries, peaches, apricots, or whatever’s in season)
- 4 cups of sugar
- 2 tablespoons of lemon juice
- 1 package of pectin (optional, depending on the fruit’s natural pectin content)
Equipment:
- Large pot
- Canning jars with lids
- Ladle
- Canning funnel (optional but helpful)
- Jar lifter or tongs
- Clean cloths for wiping jar rims
Instructions:
- Prepare the fruit: Wash and chop the fruit. If you’re using berries, you can leave them whole, but larger fruits like peaches or plums should be chopped into small pieces.
- Cook the fruit: In a large pot, combine the fruit, sugar, and lemon juice. Bring the mixture to a boil over medium heat, stirring occasionally. Once it boils, reduce the heat slightly and simmer for 15-20 minutes, continuing to stir. If you’re using pectin, follow the package instructions to add it at the appropriate time.
- Check for the set: The “set” is when the jam thickens and gels properly. To test, place a spoonful of the jam onto a cold plate and let it sit for a minute. If it wrinkles slightly when pushed, your jam is ready. If not, cook for a little longer and test again.
- Jar the jam: Using a ladle, fill your sterilized jars with the hot jam, leaving about a ¼ inch of space at the top. Wipe the rims clean, place the lids on, and screw the bands down tight.
- Seal the jars: Process the filled jars in a boiling water bath for about 10 minutes. Carefully remove the jars with tongs or a jar lifter and let them cool on a clean towel. You’ll hear the satisfying sound of lids “popping” as they seal.
- Store and enjoy: Once the jars are cool, check that the lids are sealed properly (they shouldn’t flex when pressed). Store in a cool, dark place, and once opened, keep in the fridge.

Ways to Enjoy Homemade Jam
Now that you’ve got your own batch of homemade jam, it’s time to explore the many delicious ways you can enjoy it! Here are some of my favorite ideas:
1. Classic Toast: A simple slice of toast with a generous spread of jam is a timeless breakfast. Choose hearty bread like sourdough or whole grain to balance the sweetness.
2. With Cheese: Jam pairs beautifully with cheese, especially varieties like brie, goat cheese, or sharp cheddar. Spread a little jam on a cheese board for a sweet-savory combination that’s perfect for a snack or appetizer.
3. In Yogurt: Stir a spoonful of jam into plain Greek yogurt for a healthier, fruit-flavored option without the added sugars of store-bought varieties.
4. On Pancakes and Waffles: Instead of maple syrup, try drizzling your jam over pancakes, waffles, or French toast. It adds a burst of fruitiness to your breakfast that’s absolutely delicious.
5. As a Glaze for Meat: Jam isn’t just for sweets! Use it to create a sticky-sweet glaze for meats like pork chops or chicken. Simply melt it down with a little vinegar and herbs for a glaze that’s both fruity and savory.
6. Homemade Tarts or Pastries: Use your homemade jam as a filling for mini tarts or thumbprint cookies. It adds a homemade touch to your baked goods that’s hard to beat.
7. Over Ice Cream: For an indulgent treat, warm up a little jam and drizzle it over vanilla ice cream. The contrast between the warm fruit and cold ice cream is divine!
Flavor Variations to Try
One of the best things about making jam is that the flavor possibilities are endless! Here are some creative ideas to inspire your next batch:
- Strawberry Basil Jam: Add fresh basil to a classic strawberry jam for a surprising herbal twist.
- Peach & Ginger Jam: The warm spice of ginger pairs beautifully with the sweetness of summer peaches.
- Mixed Berry Jam: Use a combination of strawberries, blueberries, raspberries, and blackberries for a burst of berry flavor.
- Apple & Cinnamon Jam: Perfect for fall, this jam has all the flavors of a cozy apple pie.

Final Thoughts
Making homemade jam is a rewarding experience that allows you to enjoy the best of nature’s bounty. Whether you’re spreading it on toast, incorporating it into savory dishes, or using it to enhance your desserts, there’s no shortage of ways to savor the fruits of your labor (pun intended!).
I hope this guide inspires you to get into the kitchen and try your hand at making jam. It’s easier than you think, and the result is a jar of sweet, delicious goodness that you’ll reach for again and again.
Here’s to savoring every sweet moment!
Love, GertieBlu


